Friday, February 07, 2014

Garb in the Snow

As Petra put it, one more item crossed off the bucket list. Garb pictures in the snow.

Here in the Pacific Northwest, we are having an unusually snowy winter. The rest of the country too. As a reward for sitting inside and staring out at the falling snow...


When we let out at 1pm (they cancelled classes at 10am) Petra came and picked me up. Driving to my house to pick up projects, she looked at me and sang "Do you want to build a snowman?"

The answer was "YES," of course. We decided the only way to make it any better was to do it in garb. So back to my house we went to pick up garb.

So we went to her house and put on our garb, did our hair and put on our snow-boots.
We both put on our Housebook Dress, which is a late 15th century German style (typified by a set of pleats at the center front and back). Petra is wearing a gefrans with her braids, and I (I am in pink) am wearing my fringed kappe that I blogged a tutorial on earlier.

We probably have a good 8 inches of snow, if not more (elsewhere close by, I heard 16 inches). It was lots and lots of fun! Although the snow was too dry for snowmen... to our sadness.

But we still had lots of fun!


And we took some more serious ones as well:


But then we went back to playing in the snow:


I think this one is my favorite:


Wednesday, January 15, 2014

Kappe Tutorial Published!

A tutorial on the German Fringed hat (late 15th century) that I wrote was just published in one of our local SCA newsletters! If you haven't read it yet you can find it here.

Now off to madly plot my next blog entry. Cause I have a new (mostly finished dress). I may have worn it to 12th Night still with safety pins in it (and straight pins), but I wore it. You know how you get to the end of a project, but you haven't quite finished it enough? But you have been working on it soooo hard, that you still need to wear it? Yeah... that was my Saturday this weekend. Petra can confirm that I was absolutely mad this weekend.

Tuesday, December 24, 2013

Alpine Scholar

Last weekend I went to Klamath Falls (my impression of the place is cold) for our Principality's Arts & Sciences Championship (and Investiture). I came away from this as the Principality A&S Champion, or Alpine Scholar.

For those not in the SCA, that means I presented 3 papers/projects on SCA appropriate subjects for judging and feedback.

My three entries (which you can see in the next picture) were:

1) My Housebook Dress and associated layers.
2) A paper looking at different possible pleating styles in imagery of the Housebook Dress.
3) A paper and reconstruction on 3 Italian Stockings.
I had a great time! There were 5 other entrants, and it was neat seeing all the other projects people were working on and doing research on. Bookbinding is apparently popular right now.
I plan on more posts on the layers of the Housebook Dress in the next month (once I have recovered from writing three papers at 4, 10 and 14 pages), so check back later!

Sunday, December 08, 2013

Housebook - hemd

Hi all! I have been working on a new outfit for awhile now. This one is the "Housebook" Dress based on late 15th century German clothing. I already introduced you to my new fringed hat, and the next layer on the list is my shift:

Shifthemd

Introduction: Hemd is the German term for shift or chemise. For this outfit, it constitutes the under layer and is seen at the open front of the gown over it.

Materials: For fabric I chose a light-weight linen/cotton blend. Linen was the common fiber for undergarments, but fustian, a fabric with linen warp and cotton weft, was being produced in Germany by this time. The thread I used for construction is a modern cotton thread.


Construction: My shift is a fairly basic rectangular type construction with a gathered neck. The construction is based off of a 12th/13th century tunic that is attributed to St Francis of Assisi. 

Let me know if you are interested in more of a tutorial. This post is focused more on what I based my construction on.

Note on the diagram above: The front and back shoulders should be the same width so they will match up when sewn.


St Francis of Assisi tunic (Anonymous, Tunic) - This underarm gusset/gore construction is one of my favorites. This is a construction where the gore of the skirt is cut so that it continues up into the seam of the sleeve, rather than stopping at the waist. I find this construction on a shift avoids bulk under the arm and gives me a good range of motion.

As the neck line of the dress itself is wide and low, there is good visual evidence of the neck of the shift underneath. There are also a few images of ladies in their undergarments to support this. There are several types of necklines visible (including pleated, smocked, embroidered, plain, etc…). I chose to go for a gathered neckline with a narrow neckband. 

I based the gathering on the next two images, although I went with straight sleeves like the first image, rather than the fuller ones of the second. The second set of images is of Saints and likely shows an outer garment rather than the hemd, but they show the same gathered neck.
1475; Master of the Housebook: 
Peasant woman with sickle and shield

1475/1500; Master of the Housebook: Woman
with Two Children and a Blank Shield
1470; Adriaen van Wesel: De heilige
Agnes
1475 Adriaen van Wesel: Knielende Maria,
fragment of the Maria-altaar van de
Onze-Lieve- Vrouwebroederschap te Den Bosch

1497; DÜRER, Albrecht: Portrait of a Young
Fürleger with Her Hair Done Up
I chose to gather the shift only in front to put all the excess fabric in the open neckline for visual effect. It is also mid-calf length on me so the hem doesn't get dirty.
c 1475/85; The Birth of St. Roche from the
altarpiece of St. Lorenz in Nuremburg.
c 1485/90; Master of the Housebook:
St Barbara and St Catherine


1485; Master SH: Works of Mercy. Werke der
Barmherzigkeit; Einrichtung sakral


I am quite happy with the finished project! And it looks great under the Housebook (even though you can't see very much of it...

My new Hemd - Winter 2013
An Tir West War 2013
Further reading:

Subtle as a Thrown Rock's hemd
Eme's Compendium and a survey of 15th century German visual and extant resources.

Thursday, November 21, 2013

Cap of St Birgitta Tutorial

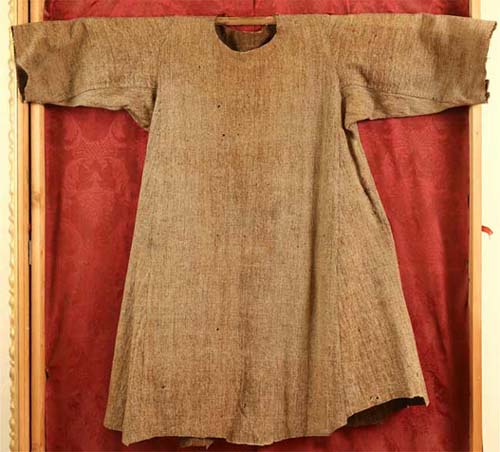
This is a tutorial on how to make the "Cap of St Birgitta," a coif seen in Medieval Europe from the 15th century through the 15th (and possibly early 16th) centuries. This is based on the one extant example as well as various period visual sources. You can read my previous posts on the cap for more information here or here, or you can visit Medieval Silkwork (where I first discovered the cap).

I love this cap, it is perfect to wear on its own or under hats and veils. It keeps my hair clean all weekend (if I wear it) and helps my outfits look "right". If you have any questions, please leave comments!

The author and Amya Weaver (Caid) wearing
my first two attempts at the making the cap
Directions:
1. Cap - First cut 2 squares of your linen. For a generic cap, I cut 10.5-10.75" squares for a small, 10.75-11" for a medium and 11-11.25" for a large head.

To cut based on your head measurement, measure your head around with the measuring tape going from your hairline in front (forehead) to the nape of your neck (this is where the cap will sit when being worn). Divide this number in half and add .5” for seam allowance.

Example: My head is 20.5” (20.5/2) + .5 = 10.75 - I normally wear a women's small in hats.

NOTE: Your two pieces do not have to be perfectly square. Two rectangles of the same size will also work (especially if you have short or thin hair). If you do go with a rectangle, the long side should be oriented upright to follow this diagram.

Ties/Loop - Cut about 60-70 inches of 2 inch wide strips for the ties. If you have to cut several lengths to get sufficient length, sew the ends together to make one long strip.


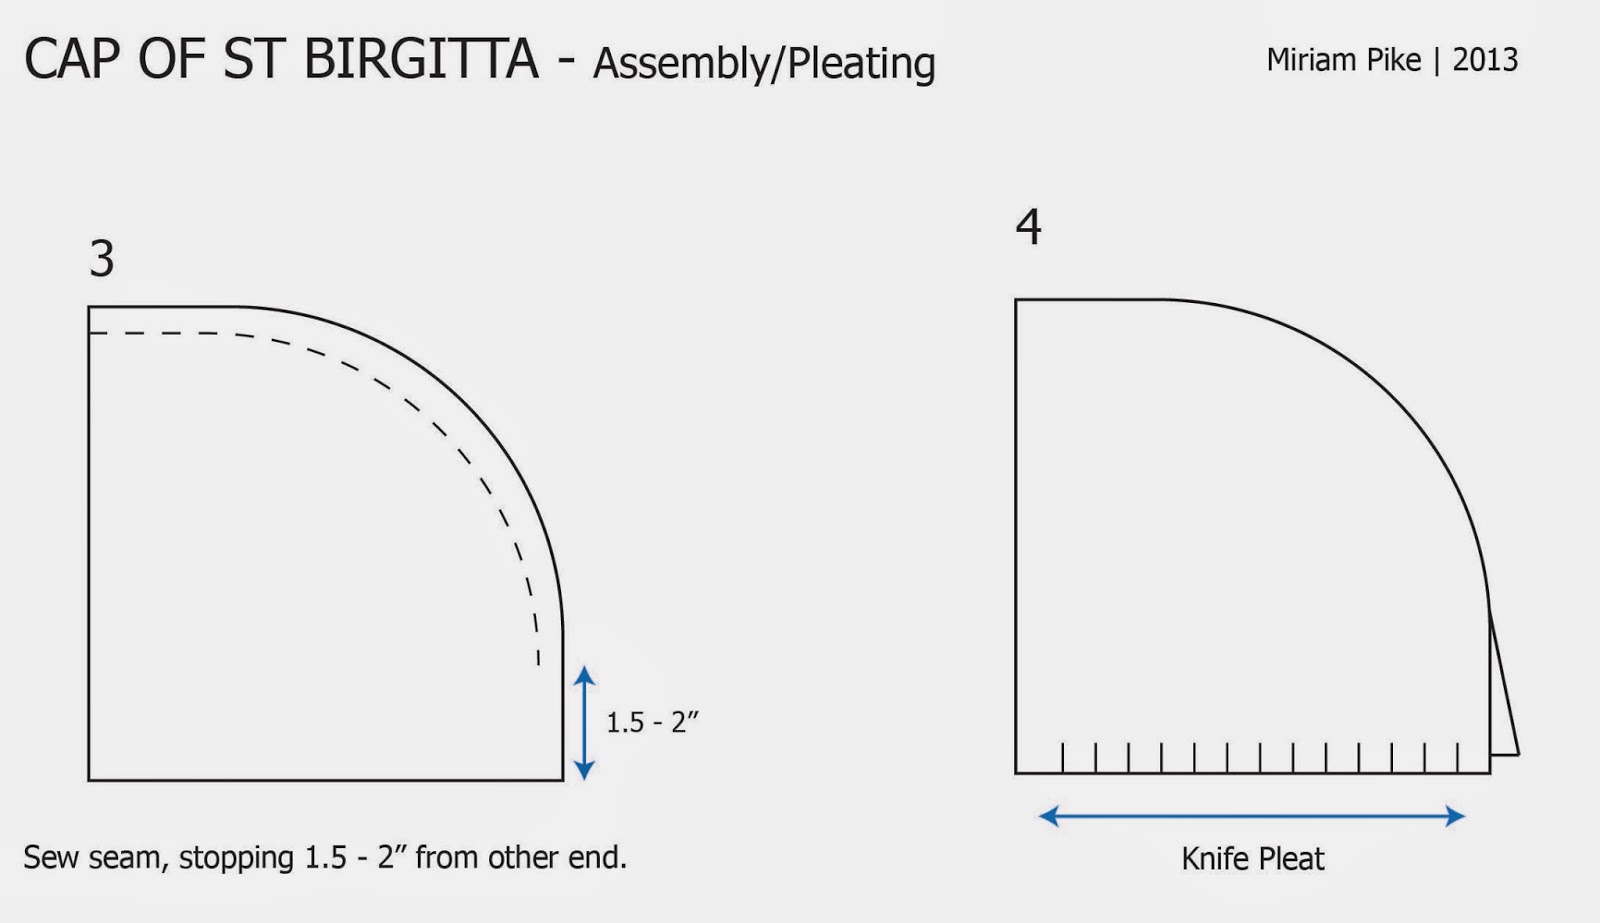
2 Now round one corner of both pieces as shown above. This does not have to be a perfect curve, but try to avoid sharp turns.

3 Sewing - Sew both sides of the cap together along the edge you have just curved as shown. Start at the edge on one side and stitch down to 1.5-2” from the edge on the other side. Finish this seam by pressing the seam allowance away from the seam on each side and sewing down.

Optional Embroidered Seam: The extant cap has an inset embroidery replacing this seam that connects the two halves. If you want to try this out, work your embroidery stitch in place of the seam. Check out how these tutorials for the embroidery:

Elysa's Endeavors (really nice, clear drawings of the embroidery)


4-5. Pleating - Now that the top seam of your cap is sewn, you will be pleating the bottom edge of the cap. This is the square edge of the cap on either side of the gap you left when sewing the top seam (shown with the blue arrow above). I usually do stacked knife pleats (one on top of another); you want the finished pleated length to be between 2-3”. A depth of .75-1" pleats works well for me in a medium weight linen. Once you have the pleats arranged, either baste or pin them to keep them in place while you sew on the ties. You will have a corner at the front of the cap (away from the seam), either round the corner off slightly, or make one last pleat that is tucked sideways to make a continuous line as you see in figure 5.

For information on how to pleat fabric and other options for pleats, try the Elizabethan Costuming Page

6 Attaching the ties - Now, take the strips you cut earlier, these will be your ties for the cap. If you have not already done so, make sure your strips are sewn together to form one long strip. Now, iron your strip with these 2 steps:

1) fold the edge over on each side by about 1/4 inch and iron
2) fold the strip in half and iron again.

Once that is done, pin the tie/loop around the raw edge of the cap, and begin stitching it down. I usually start at the center front and stitch one side and then the other. If you have not yet rounded the corner at the front of the cap, you will need to do that as you sew on the tie. Stop stitching once you reach the gap at the back of the cap after the pleats. Sew the ties down on the other side of the cap (starting from the center front) the same as the first side.

7 Finishing - When you are done with that side, try on the cap and figure out the length your ties need to be. To try on your cap, the ties should crisscross in back of your head under your bun/hair, and cross to your forhead at the front of the cap. There they crisscross and the last loop lays on the back of your head over your hair The key to this cap is a fairly snug fit. Linen stretches when warm so it will loosen gradually as you wear it. This is fairly easy to make smaller later if you need to change the size. Pin the ends of the ties together once you have found a length that works for you. Take the cap off and sew the ends of your ties together at the point you marked. Now sew the tie closed along the length of the tie.
Wearing the Cap
Left: Sleeves GFD over long-sleeved shift with cap.
Middle: Red overgown over green GFD, or gothic fitted gown.
Right: Another view of the plain cap (Baronial A&S)
Since the cap spans a range of several centuries, you have a fairly broad range of things to wear it with. I generally wear my cap with my 14th/15th century garb as it completes the outfit so well. I generally braid my hair in two braids and either pin or sew it back and forth at the back of my head to fill out the cap. I have put my hair up in a straight bun before, but I find it pokes the cap out at the back, rather than filling it out nicely.

Over the Cap?
Left: 14th century cotehardie with cap and veil.
Middle: Working class Flemish outfit (1570s) with cap and a flat cap on top.
Right: Working Class Flemish with straw hat over cap.
The cap also makes a fabulous foundation layer for other headgear. In addition to being worn on their own, caps were worn under veils (as seen in these Italian images) and hats. With a couple of hat pins/straight pins at the ready, you are all set!

Links and Sources:
-Dahl, C.L. & I. Sturtewagen, 2008, The Cap of St. Birgitta, Medieval Clothing and Textiles vol. IV, pp. 99-129
- Medieval Silk Work - Women's Caps
-More of my Cap of St Birgitta images on Pinterest

P.S. I love seeing finished caps! So link to yours if you have pics.

Follow Miriam Pike Cap of St Birgitta on Pinterest


Tuesday, November 19, 2013

More Fringe hat!

I have discovered the pinterest widget. Let's see if I can make it work here for the fringed cap: Follow Miriam Pike Kappe - Fringed German Hat on Pinterest

Update: Okay, didn't work at first, but I think I have it working now, let me know if it doesn't work for you!

Sunday, November 17, 2013

Cap of St Birgitta - Italian style

In 2009 I made my first cap of St Birgitta. I discovered the cap through Medieval Silk Work (a fabulous blog if you haven't already discovered it) and decided I loved the cap.

Since making my fist cap in 2009, I have been keeping my eye out for images of these caps in other places/times.

I have found a number of Images from the 14th and 15th century in Italy that greatly resemble the shape and style of the cap suggested by Isis on her blog and in her article of the Cap of St Birgitta in Medieval Clothing and Textiles IV (Dahl, C.L. & I. Sturtewagen, 2008, The Cap of St. Birgitta, Medieval Clothing and Textiles vol. IV, pp. 99-129.). She talks about these plain white caps that can be seen "from the 13th to 15th centuries. Examples are known from Italy, France, The Low Countries, Scandinavia"...


Maciejowski Bible c 1250 | image from Medieval Silk Work

Images of this style of cap typically show a white cap that goes in an continuous line from the forehead to the nape of the neck. A loop at the base of the neck is then looped over the head (as seen above) to tension the cap and secure it in place. The length of the loop determines if the loop sits over the bun (as seen in the Maciejowski bible images above) or below the bun.


I have posted some images to more easily compare with the the following images I have collected:

1508 Girolamo di Benvenuto,
Portrait of a Young Woman
Although ties are not visible on this first image, the shape of the cap greatly resembles the Cap of St Birgitta, with the small white cap covering the hair and gathered at the base of the neck.

This young woman is also wearing a sheer veil over her cap.


1452-66 | Fra Filippo Lippi | Detail of
 Fresco cycle in the Prato Cathedral
This second image clearly shows the loop crisscrossed to the back of the head and worn behind the ears.


1328; Simone Martina: Detail of
 A Child fallen out his cradle healed by
 Blessed Augustine; Sienna
The earliest of the three, this last image is a little harder to see (this is a small figure in the original image), but you can see the cap worn under a sheer veil as in the first image. You can also see the indent in the cap at the back of the head that could indicate the loop.


Links and Sources:
-Dahl, C.L. & I. Sturtewagen, 2008, The Cap of St. Birgitta, Medieval Clothing and Textiles vol. IV, pp. 99-129
- Medieval Silk Work - Women's Caps
-More of my Cap of St Birgitta images on Pinterest
My tutorial on how to make the Cap of St Birgitta